Graphic design is more important to the church now than ever before. We live in an extremely visual world that has come to expect great looking graphics in both communication and branding.
With so many graphics to create, along with all of the other things packed into your schedule, your time is extremely valuable. Here are a few quick fixes that will go a long way to speed up your design process and ultimately make you a better designer.
I primarily use Adobe Photoshop and Illustrator for all of my designs, but many of these principles are applicable to any software.
1. Label Your Layers and Artboards
The more complex your designs become, the more difficult they can be to navigate. Take time to label each of your layers and artboards as they’re added to your project. It may seem insignificant now, but you’ll quickly discover how much stress it takes away from your design process when you can click with confidence.
2. Create A Custom Color Palette
There are advantages to designing graphics for the same organization all the time. Since you’ll be using the same set of colors frequently, you can add them to a swatch set that’s super easy to access on the fly. It saves a ton of time to not have to chase down color codes for every graphic you create for your church. Here’s a quick tutorial for this in Photoshop.
3. Be Consistent In Your File Naming
Creating a consistent structure for naming your files may not be the most exciting item on this list, but it’s one that you’ll be thanking me for. Not only will it help you stay organized, but everyone that you work with will love you for it. I’ve included an example of mine below, but yours may look completely different. What’s important is that you take away the guessing game and name your files something that makes sense to everyone.
My File Naming Structure:
Organization Name >> Department Name >> Project Name >> Individual Item >> Version
Example:
Piedmont_Chapel-Guest_Experience-Lobby_Signs-Welcome_Banner-Final.psd
I use dashes (-) to separate sections and underscores (_) to separate words inside sections.
4. Keep Your Resources Organized
Whether it be fonts, templates, textures, or stock photos, resources are an essential part of graphic design. To get the most value out of these tools, you’ll want to keep them organized and easily accessible. I’ve found that a simple folder where I can store each of these resources separately goes a really long way. I keep this folder synced on my Dropbox so that I have access to all of my files from each of my computers. Anything that you can do to keep them from piling up in your downloads folder is a win!
5. Archive Everything
Believe it or not, your most valuable resources are the graphics that you have already created. It’s extremely useful to be able to pull logos and other design elements from a design file that you worked on last week rather than searching through the web. Even more, a situation may arise where you may need to make a change on a project you designed years ago. Hold onto every design that you create.
What Do You Think?
Do you do any of these in your design process?
Let us know by leaving a comment below!


Point # 5 – What are your long-term storage tips for holding on to everything? Especially for video. I have cleared out through my computer recently because I was running out of storage. While I was able to move a lot of files to an external drive, I also culled through and deleted a BUNCH of things that I analyzed to no longer be useful.
I agree, sometimes you can go back to older designs and recycle things, but everything adds up! So do you tend to keep the original .PSD or .AI and delete the various flattened copies? Do you have a drive per year?
Video can get expensive when it comes to archiving. I keep all footage from shoots on external drives.
I keep all of my graphic designs from the past several years accessible with a pro account on Dropbox. Anything over three years old I keep on a few external drives.
All of this has been easier as storage prices drop.
My storage solutions may not be the best – just works for me! :)
Great input!
We started creating project tickets for everything–no matter how insignificant–and every photo had a number tied to its requested project. So we then name the Photoshop layer the name of the photo. This allows very quick archive retrieval of that specific photo for another project. Same for Illustrator or Premier.
Each piece of media gets its own number as well so that it is traceable back to the database. This keeps the file names a little bit shorter but effectively does the same thing. Our banner would be named WOL16-00215-004.psd, meaning WOL=Word of Life, 16=year, 00215=Project number, 004=fourth file or rendition of this series. The file number is on every print or released digital artwork so that it can be traced if need be.
We haven’t yet perfected our keyword search process, but that is another big tool we want to exploit!
Thanks for the article!
I love it! Very cool. Thanks for sharing with us!
I have a great system. Once something is finished, it moved from a numbered file, to having FINAL on the end,
e.g. 2016_06_29_SundaySermonSlides_FINAL.ai.
Then when the pastor gets back to me with some more changes, it goes back to numbering e.g.
2016_06_29_SundaySermonSlides_FINAL_v3.ai
And once it’s finalised again, I add final on the end, so now we have
2016_06_29_SundaySermonSlides_FINAL_v3_FINAL.ai
Two more rounds of last minute tweaks give us
2016_06_29_SundaySermonSlides_FINAL_v3_FINAL_FINAL_v2_FINAL.ai
Can you feel my pain ;)
Been there! I feel your pain. ;)
Hahaha I just choose to NEVER use the word “Final” I just keep using numbers no matter how high it goes. Then when I come back later I always know to pick the one with the highest number :)
Haha! Been there, never again. Pretty much because “final” is never “final.” I love the old joke, “You know what it means when a pastor says, ‘In closing…’? Absolutely nothing.”
We had an artist that would name is files, X-final, and then X-final-gold. Then X-final-platinum. Then X-final-platinum-final. It was ridiculous!
That’s why we went to the number system, the highest number was the most current. Good stuff!
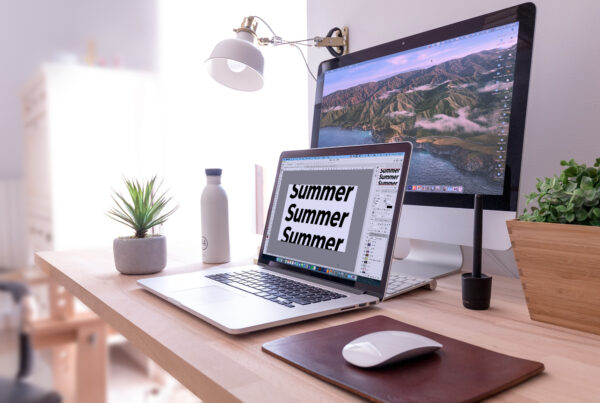
Any idea what is that waccom tablet-ish thing in the header graphic? It looks like a cross between the magic trackpad and a waccom tablet.
nevermind, found it. It is a Wacom Intuos Pen. thanks google! :p
I am so glad you wrote this. I am trying to get into graphic design for our kids min. I am currently using Photoshop elements to design, which is not the best, but it works. With that kind of stuff, do you have any pointers to make simple, attention getting graphics, as a starting-out designer.
Thanks
These are extremely helpful and seem like common sense–now that you’ve pointed them out! I also like the “Final” comment above.
Here’s another one for me that’s a little bit of a different take: set a realistic time goal, and then check the clock! Again, common sense, but it’s so easy to get immersed and think that only minutes have gone by, when it turns out to be hours. It helps to even break down the project into sections with time goals.
Hello, just a tip that might be helpful to someone. We set-up an account with BOX through techsoup.org, an organization that provides discounted software (and other things) for non-profits. We are on a plan that provides unlimited storage for $7.50 per month, per user. The only limitation is that each file we upload has to be under 5gb.
These are great tips.
Using the simple commands to take a screenshot of part of a screen cmd+shift+4. Many times this saves you time redrawing things.
So Helpful and Always helpful. Am the Media Director of Calvary Chapel, Entebbe, Uganda, and ever since I found this platform, it is been amazing how dynamic and impacting media is, thank you thank you thank you thank you (Asante, Webaale-that’s thank you in my local language)